Showing posts with label Tutorial. Show all posts

Smoky green eyes: Festive makeup

Well hello to you my reader chums! Christmas is under a week away so whether you want to try a new makeup look for the big day itself or have any parties beforehand, I've put together a smoky, olive toned eye to share with you. Instead of my usual go to gold/copper eye with a red lip, I thought this look was a bit more daring, especially for those who love a smoked up shadows.

Here's how to achieve the smoky green eyes:

Christmas makeup ideas

Christmas day makeup

Sephora shadow stick:

To begin and ensure my eye make up lasts the entire day, I applied Sephora shadow stick in 'Kaki'. As it's in a pencil shape, you can easily draw it on and blend out with your fingers. I like to take the stick all over the lid and into the crease, blending it out to achieve an ultra shimmery, khaki base. The consistency is incredibly creamy and a dream to blend onto the eyes. It's highly pigmented and densely packed with shimmer, ideal to use in the festive season for a top notch glittery eye.

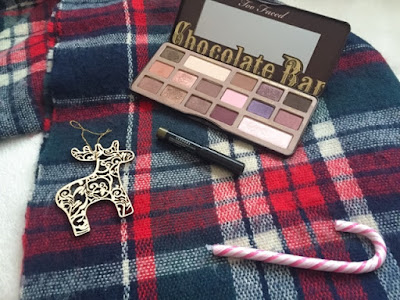
Too Faced Chocolate Bar palette:

For more intensity and to darken the look further, I packed on shade 'Gilded Ganache' all over the lid, a dark and olive coloured shimmery shade. Then for extra smokiness, blended out the shade 'Triple Fudge', a matte, khaki colour on the outer corner and under my bottom lash line. To finish, I applied shade 'White chocolate' on the inner third of my eye, for a brightening effect.


Christmas day makeup ideas

Lips:

Since the eyes were quite intense, I toned down the look slightly with a nude lip, Nyx matte lip cream in 'Cannes'.

How to do a smoky eye

I hope you enjoyed this quick and easy eye makeup look. What's your go to festive makeup?

Thank you for reading <3


Spring makeup look ❤️

Well hello to you my reader chums! As May is slowly drawing to a close and the summer months are nearing, I'm going to share with you a spring makeup look I've been wearing frequently over the past month or so. When it comes to spring, the pink toned shadows, glowing cheekbones and nude lips come into play like the sun's natural shine; I love it.

Here's a look at the my makeup:

Spring makeup look

An overview of the products I used:

Spring makeup products

Base spring makeup products

Base:

After moisturising, I start off with my favourite primer L'oreal's Infallible. I love to use this on an everyday basis as it keeps my makeup completely in place and the shine at bay throughout the day, including my oily T zone area. For foundation I mix the lightest shade 'porcelain' with 'vanilla' of the L'oreal Infallible foundation to achieve the perfect colour to match my skin. Once that's blended in, I apply Rimmel's Wake me up concealer under my eyes and on any blemishes, then set the whole base with Rimmel's Stay matte powder.

Contour and highlight products

Contour and highlight:

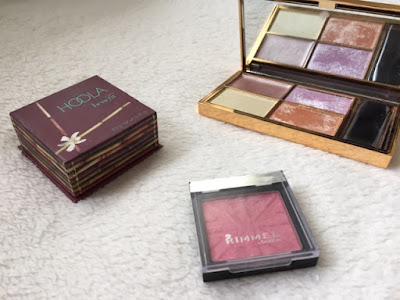
For contour, I opted for my number one bronzer, Benefit's Hoola because it achieves a gorgeous bronzed glow to the skin and is the best product I've used for a complete contoured look. I chose a rosy toned down blush for a little flush of colour as I wanted more focus on the highlight. Since spring is the season when everything blooms and the sun begins shining more, I love to have stunning shimmering cheekbones. From Sleek's Solstice palette, I used the cream shade 'Ecliptic' as the base and dusted 'Hemisphere' over the top for a more dramatic sheen.


Eyes and brows:

I stuck to my usual brow routine with a L'oreal shadow in '106' and clear brow gel to set it. Onto eyes, I wanted to create a shimmery pink look as it's my go to makeup for spring. To start I used Maybeline's colour tattoo in 'Pink gold' to give the lids a wash of pink and set it with the shade 'Sin' from the Naked 1 palette. I then darkened the eye slightly with 'Toasted' in the outer corner and ran 'Naked' through the crease for a bit of warmth. To define the eye, I took a blend of shades 'Primal' and Undone' in the outer third of the eye. To finish I highlighted the inner corner, lined the eyes with L'oreal's Super liner, curled my lashes and then applied a couple coats of my favourite mascara, Maybelline's Lash sensational.

NYX matte lip clream in Stockholm

Lips:

I kept the lips rather neutral because I wanted the focus to be on the glowing eyes and cheekbones. The colour I chose was one of my very recent purchases, NYX's matte cream lipstick in the shade 'Stockholm'. It's a gorgeous dusky pink, brown shade and I absolutely love the effect it adds to the overall look.

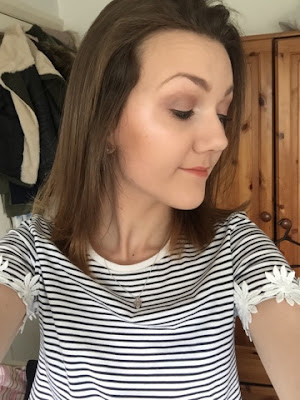
Here's a closer peek at the final makeup:

Spring makeup look
Spring makeup look

I hope you enjoyed this makeup tutorial style post. What are your must have spring products?

Thank you for reading <3

Tutorial: Quick and easy makeup look

Well hello to you my reader chums! Today I wanted to share with you a quick and simple makeup look I like to wear on days where I'm either in a rush for work or don't really fancy the whole full face coverage. The look is quite basic and natural, providing a substantial amount of coverage, glow to the skin, yet doesn't look too much for an everyday basis.

Here are all the products below:


Base: 
Rimmel's BB cream in 'Light'
Rimmel's Wake me up concealer
Rimmel's Stay matte powder in 'Silky beige'
The Body Shop's bronzer in '02'
Rimmel's blush in '050 Live pink'

For the base, I primed my skin and started off with a new discovery, Rimmel's BB cream. As it provides a light coverage, I applied it with my beauty blender because I find this helps build up layers, blending it in easier and achieving a flawless finish. I then took my concealer, dotted it under the eyes, a touch on the forehead and over any blemishes. To set the base I dusted powder all over the skin, ensuring it'll last all day long. Since this makeup is rather quick, I opted to slightly contour the cheekbones, bringing some warmth to the skin and then applied a blush to give that rosy flush/ highlight to the cheekbones.

Eye brows, eyes and lips:
L'oreal's eye shadow in '106'
Maybelline's Lash sensational
Dr Paw Paw's 'Tinted peach pink balm'

To keep the eye look swift, I simply filled in my brows with the usual L'oreal eye shadow and used it also as a contour shade for my eyes, to add a warmth of colour without putting together a full eye look. I finished with a couple of coats of mascara and a slight sheen of a pink colour over the lips.

There we have it the completed look: 


I hope you enjoyed this post. What's your go to makeup look?

Thank you for reading <3

Makeup tutorial: Prom inspired look

Well hello to you me reader chums! Its crazy to think that around this time last year I left sixth form and was looking forward to my leavers ball; time honestly goes so quickly. Therefore, since its prom/leavers ball season, I thought I would share with you a look I put together that can be worn for this occasion or any event where you would like a special yet natural makeup look. When I had my leavers ball, I wore quite a dewy, glowy look with a neutral eye, similar to what I created today, here's the overall look:

To put together this tutorial, I used the following products:
Base:
To begin with I cleansed, toned, moisturised and then went ahead and applied Maybelline's 'Baby skin primer'. As you're going to be wearing the makeup for the whole evening, a face primer is key to keep everything in tact, especially as you'll be dancing the night away! For foundation I chose my favourite which is Rimmel's match perfection in the shade in 'classic ivory'. I love this because it gives such a dewy finish to the skin and makes the skin look much more awake. I stuck to my usual concealer and powder, where I concealed my under eye circles, blemishes and then set it into place. I wanted to go for a strong contour and chose The Body shop bronzer in 'shade 02'. This is perfect because its a matte bronzer and can be applied very naturally as an all over bronze or built up to a deep contour. To finish off the base, I applied Sleek's 'Rose gold' blush on the apples of my cheeks blending upwards. I think this is great for this event because it really helps lift and extenuate the cheek bones with the shimmery, highlighting element. For an added highlight, I also applied the highlighter in Sleek's face form kit on the top of my cheek bones and my brow bone.
Here's a close up of the bronze and highlight:
Eyes:
For the eyes, I kept to a neutral, bronze and shimmery colour with a bit of darker definition in the outer corner. To start off I primed my eyes with Urban Decay's original primer potion to ensure the shadow lasts the whole evening. I then applied the shade 'sidecar' all over the lid to add a shimmery glow. Next, I blended the shade 'naked' through the crease as my transitional colour, followed with 'cover' from the Naked2  basics, in the outer corner to add some depth to the eye. Since I can never do a makeup look without liner, I chose to draw a subtle back line on my upper lash line into a small wing. To finish off the eyes, I curled my lashes and applied a couple of coats of Maybelline's Lash sensational mascara. For my brows, I took the shade 'frisk' from the Naked2 basics and lightly ran it through them and set it with Rimmel's clear brow gel.
Here's a close up of the eyes:
Lips:
I picked one of the Revlon matte balms for the lips in the shade 'sultry'. I chose this because for one these last for such a long duration of time, meaning you can trust it won't budge for a good while! Also I love this colour, its very vintage, a brown toned dusky pink. Even though its quite a deep shade, its not too bold or bright and therefore its quite subtle and sophisticated - I love what this colour adds to the overall look.
Voila, here is the final look:

I hope you enjoyed the prom look I've created. Are any of you attending prom or leavers this year?

Thank you for reading <3